Chatting
To create a chat functionality in an application, it is necessary to make some assumptions about the requirements and constraints of the project. With these assumptions in mind, we can outline the steps for using the Conduit chat module.
Basics
To create a chat functionality within an application the first step is to create some users. Once this is in place, the next step is to create a chat room where users can participate in real-time communication. We'll need a chat room with some users to participate in now that users have been created. We can accomplish this in two ways:
- By creating a chat room , as a Conduit Admin through Conduit Admin Panel.
- By creating a chat room, as a Conduit User using chat user routes.
Let's follow the second way, to see how a user can create a room.
Create a room as user
To begin, a user must be logged in before proceeding with the creation of a room. In case of using the local authentication strategy, you can see how to log in as a user by following the Local Tutorial. At this step we'll need the user access token. Then just simply type in a terminal:
curl --location --request POST 'http://localhost:3000/chat/rooms' \
--header 'Content-Type: application/json' \
--header 'Accept: application/json' \
--header 'Authorization: Bearer "userAccessToken" ' \
--data-raw '{
  "roomName": "Conduit Users",
  "users": ["participantUserId1","participantUserId2"]
}'
Three individuals will be placed in a room dubbed Conduit Users. It should be clear that in order to build a chat room, the authenticated user id should not be included int the user's array. The user who creates a room is also a participant.
{
    "roomId": "someId"
}
Add users in a chat room
As a user, you have the option to add new users to the chat room after it has been created. As previously stated, you must be logged in as a user to follow this tutorial, so the user access token is required.
curl --location --request PUT 'http://localhost:3000/chat/rooms/{roomId}/addUsers' \
--header 'Content-Type: application/json' \
--header 'Accept: application/json' \
--header 'masterkey: M4ST3RK3Y' \
--header 'Authorization: Bearer "userAccessToken"' \
--data-raw '{
  "users": ["someUserId1","someUserId2"]
}'
If user fits in the room successfully then an appropriate message will be returned to you.
{
    "result": "Users added"
}
Leaving a room
Chat module also provides the option of leaving a room. Again you'll need to be logged in as a user.
curl --location --request PUT 'http://localhost:3000/chat/leave/6390b1808c52d0b5a436a429' \
--header 'Content-Type: application/json' \
--header 'Accept: application/json' \
--header 'masterkey: M4ST3RK3Y' \
--header 'Authorization: Bearer "userAccessToken"' \
--data-raw ''
{
    "result": "Ok"
}
Send message
To send a message, you need to log in as a user and join a chat room. This has been demonstrated in previous instances.
See how to take the user access token in authentication docs.
The Conduit chat module utilizes Web Sockets to function. Therefore, in order to begin sending messages, you must establish a connection with the Web Socket server. Here are the steps to do so using Postman:
- Open postman and create a new WebSocket Request.
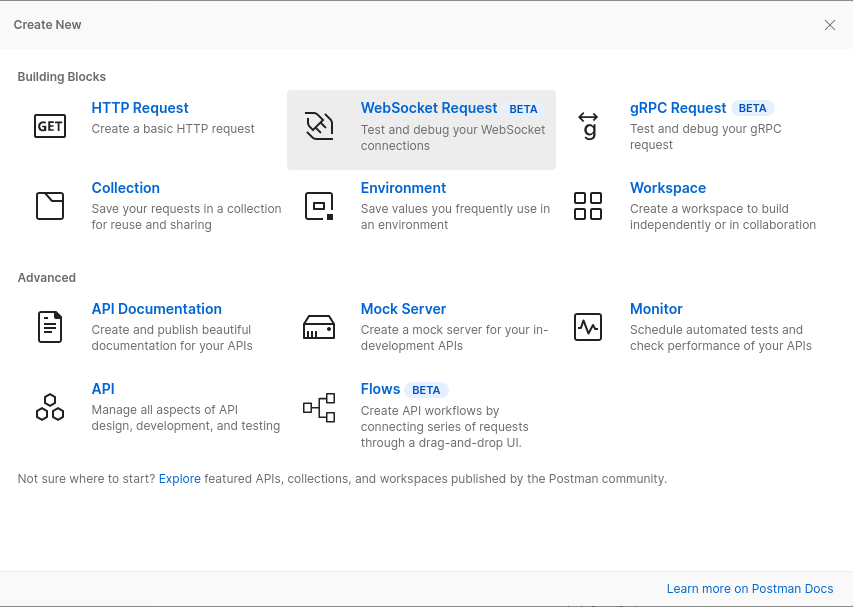
- Select Socket.IO request.
- In server URL section add http://localhost:3001/chat/ .
- Navigate to Headers tab and add the Authorization token that you got when you logged in as a user.
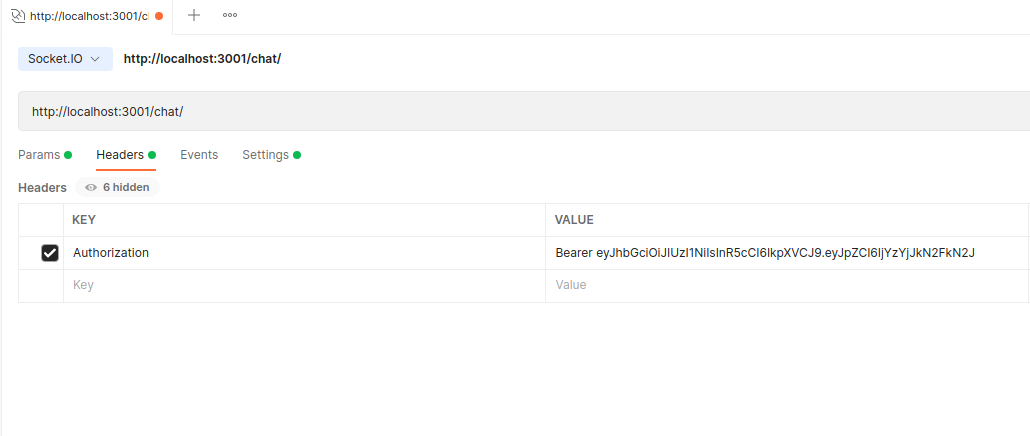
The port used is determined by the value of the CLIENT_SOCKET_PORT environment variable in the router module. The default value for this variable is 3001.
See here for more.
- Go to settings and type /realtime in the handshake path.

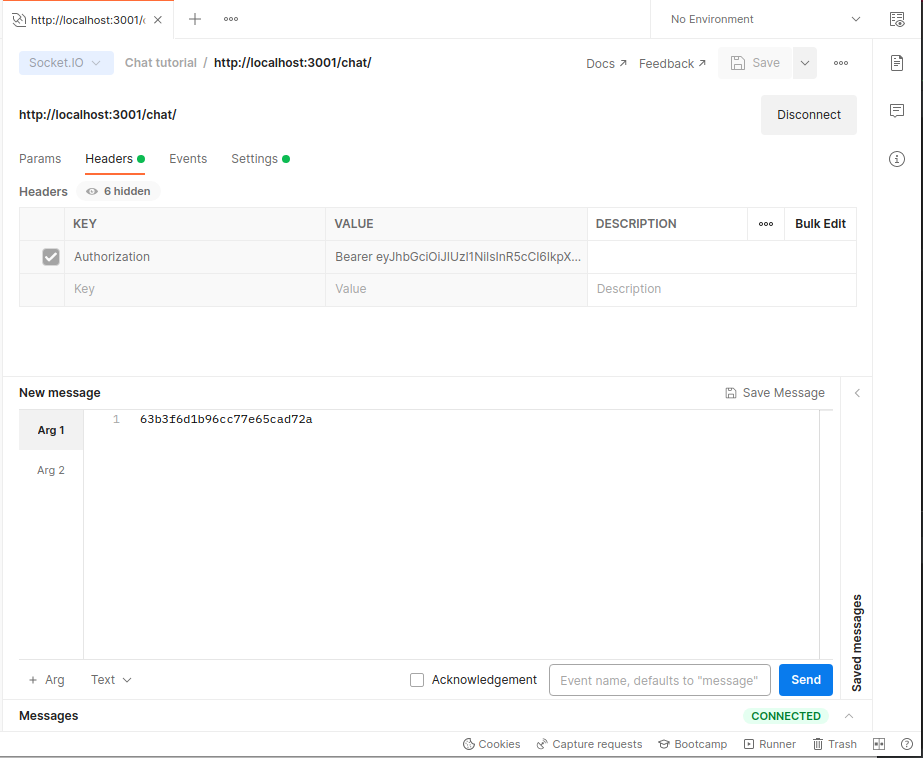
Now that you have connected to the Web Socket server, you can start sending messages. All you need is the chat room you are participating in and the message you want to send. Simply click "connect" to continue in order to start messaging!
To send a message, follow these steps:
- Open the "New message" tab.
- Create two args.
- Enter the roomId of the chat room you want to send the message to in "Arg 1".
- Type the message you want to send in "Arg 2".
To view the message you sent as a user, open the admin panel and navigate to the chat room where you sent the message. The message should be displayed in the chat room.
